TRAVERSE Global v11.1
Manage Documents
The SM Manage Documents function allows you to manage archived documents, including reprinting, purging, and exporting archived documents. You can also manage archived documents using the SM Manage Document Delivery function.
Note: You must select to use document archiving in the Business Rules function, as well as set the Archive business rules for each application in which you want to use document archiving.

- Use the Data Filter to select the range of filtering options or leave the filter blank to include all available data.
- To Print documents:
- Click the ellipsis (. . .) button in the Document column for the selected document. The system will use your computer's default PDF viewer to open the document.
- You have the option to print the document via the PDF viewer.
- To Export documents:
- Select the document(s) you want to export by marking the check box in the Select column. Use the Select All button to select all the documents, or the Unselect All button to clear all the check boxes.
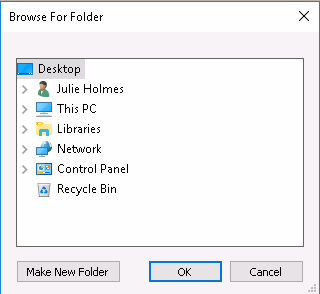
- Click the Export Documents button to export the selected documents. A browse window will appear.

Navigate to the location in which you want to save the document(s), then click OK. The document(s) will be saved as .PDF files in the location you specified. A notification window will appear when the export is complete.
- To Purge documents:
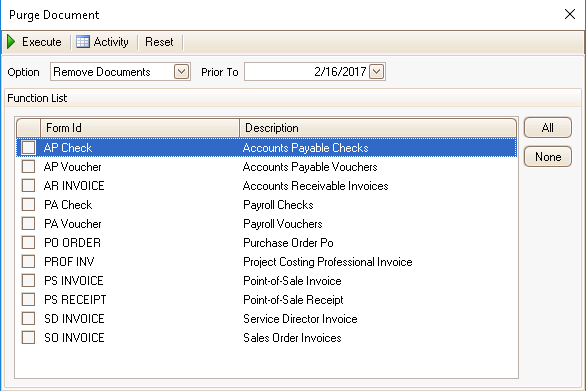
- Click the Purge button. The Purge Document window will appear.

- You have the Option to remove documents or remove document duplicates. Select an option from the drop-down list.
- Remove Documents will delete the documents prior to the selected date.
- Remove Duplicates will delete duplicates of the document; only the latest version of the document will be retained.
- If you selected to remove documents, enter a date in the Prior To field. Documents that were generated before that date will be purged.
- Select the type(s) of documents you want to purge by marking the check box next to the Form ID column. To select all types of documents, click the All button. Click the None button to clear all the check boxes.
- Click a command button to
Click To Execute Purge the documents. Activity View the Activity Log for processing. Reset Set all fields to their default values. - A notification window will appear when the purge is complete.
- Click the Purge button. The Purge Document window will appear.
- Click a command button to
Click To Export Documents Begin processing. Activity View the Activity Log for processing. Reset Set all fields to their default values. Select All Select all listed documents. Unselect All Clear all check boxes. Purge Open the Purge Document window.
